If you love the crunchy, peanut buttery goodness of Butterfinger candy bars, then you’re going to fall in love with these homemade Butterfinger Balls! These bite-sized treats are packed with the irresistible flavors of creamy peanut butter, crushed Butterfinger candy, and rich, melted chocolate. With no baking required, they are quick, easy, and perfect for satisfying your sweet tooth without spending hours in the kitchen.
Whether you’re looking for a fun weekend baking project, these Butterfinger Balls are a must-try! Their crunchy yet creamy texture, paired with a smooth chocolate coating, makes them an instant favorite for kids and adults alike. Plus, they can be customized in so many ways—you can make them with white chocolate, add sprinkles, or even create a keto-friendly version!
Table of contents
Introduction
What Are Butterfinger Balls?
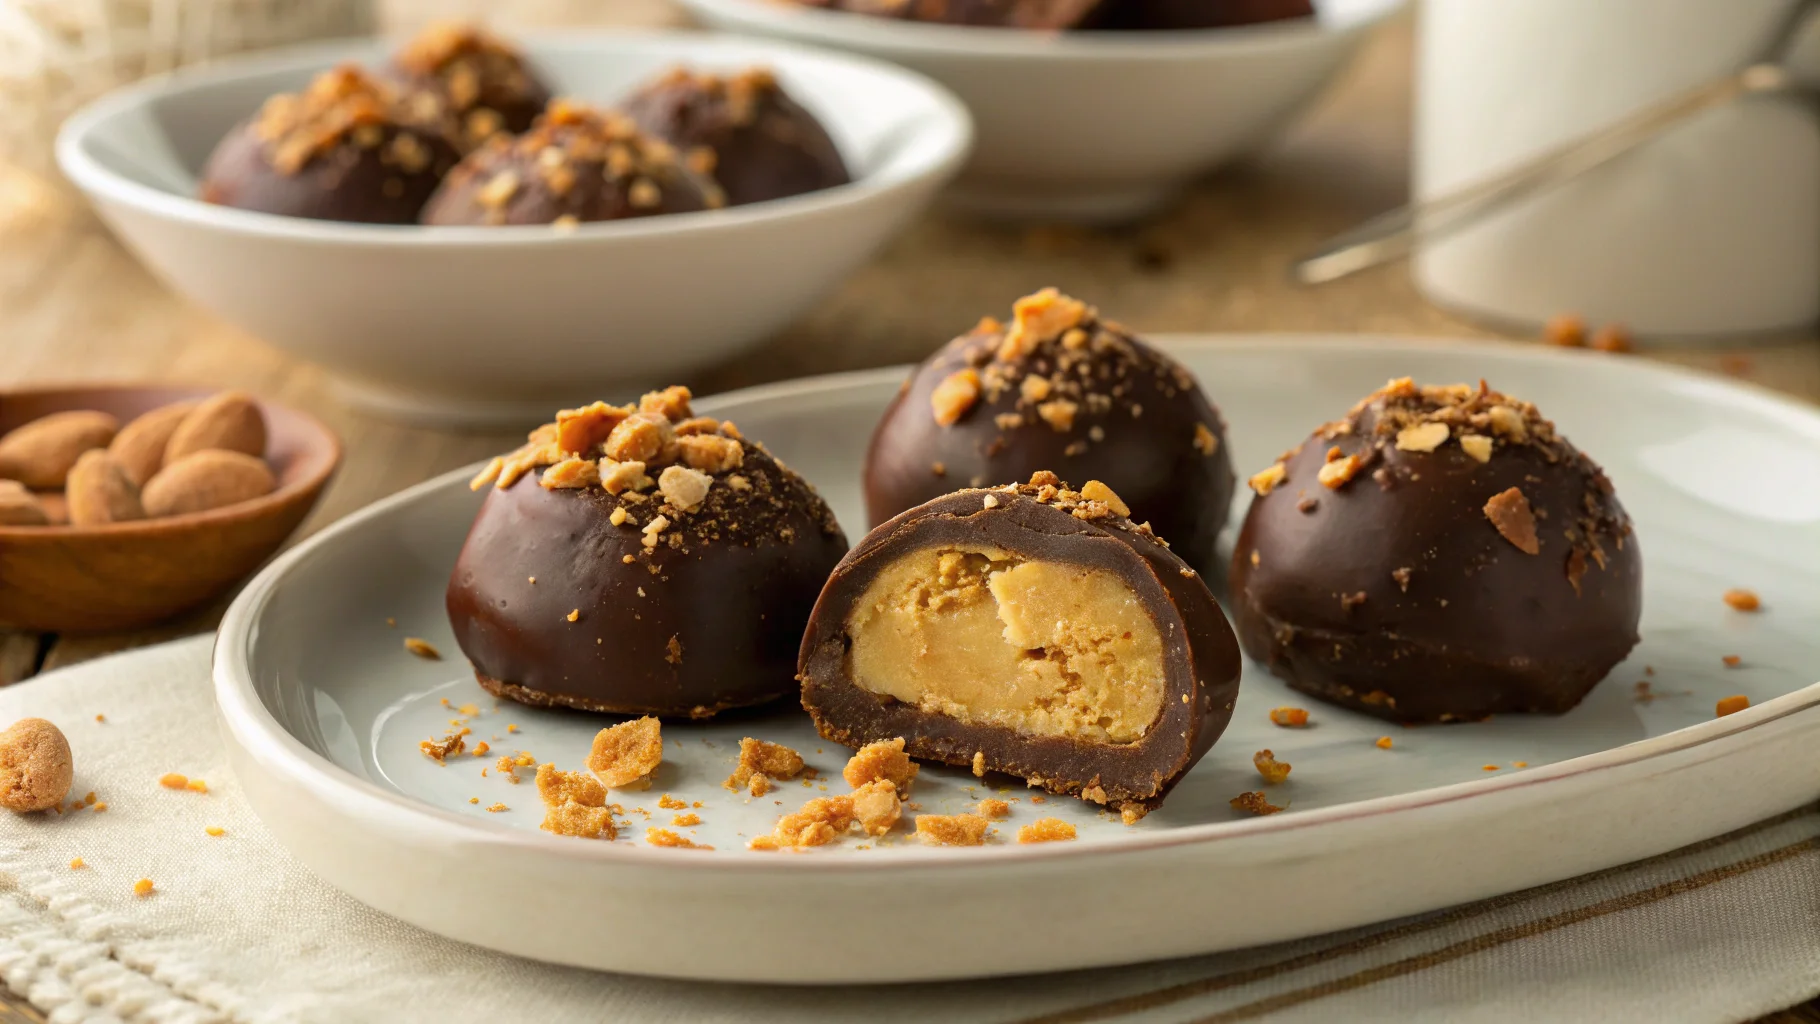
Butterfinger Balls are bite-sized, no-bake treats made with crushed Butterfinger candy bars, peanut butter, and a chocolate coating. They have the iconic flaky, crunchy texture of Butterfingers while being soft and creamy on the inside.
Why You’ll Love This Butterfinger Balls Recipe
– No-Bake & Easy to Make – Only a few ingredients and minimal effort!
– Perfect for Any Occasion
– Customizable – Adjust sweetness, texture, or even make a keto version!
– Irresistibly Delicious – A chocolate-peanut butter lover’s dream.
Ingredients & Substitutions
Butterfinger Balls require just a few simple ingredients, making them an easy and quick no-bake dessert. Here’s what you’ll need and how you can tweak the recipe to your taste.
Essential Ingredients for Butterfinger Balls
| Ingredient | Amount | Why It’s Needed |
|---|---|---|
| Butterfinger Candy Bars | 5 full-size bars (crushed) | Adds the signature crispy, peanut buttery texture |
| Peanut Butter (Creamy) | 1 cup | Binds the mixture and enhances flavor |
| Powdered Sugar | ½ cup | Adds sweetness and helps firm up the dough |
| Vanilla Extract | 1 teaspoon | Adds depth of flavor |
| Chocolate Chips (Milk or Dark) | 2 cups | Forms the smooth outer coating |
| Coconut Oil or Butter | 1 tablespoon | Helps the chocolate melt smoothly and prevents clumping |
Best Substitutions for a Unique Twist
If you want to switch things up, here are some great ingredient swaps:
- Crunchy peanut butter → Adds extra crunch.
- Almond butter → A great alternative for peanut-free diets.
- Dark chocolate chips → If you prefer a richer chocolate flavor.
- White chocolate chips → A fun twist for a sweeter, creamier shell.
- Sea salt → A pinch on top balances the sweetness beautifully.
Where to Buy the Best Butterfinger Candy
You can find Butterfinger candy bars at:
– Local grocery stores (candy aisle)
– Walmart online
– Bulk candy shops or baking supply stores
Now that you have your ingredients ready, let’s move on to making these delicious no-bake Butterfinger Balls!
👩🍳 Step-by-Step For Butterfinger Balls Recipe
Making Butterfinger Balls is super simple—just crush, mix, roll, dip, and chill! Follow these step-by-step instructions for the perfect batch.
1. How to Crush Butterfingers for the Perfect Texture
The secret to the best Butterfinger Balls is getting the right crunchy yet creamy consistency.
- Option 1: Place Butterfinger bars in a Ziploc bag and crush them with a rolling pin.
- Option 2: Use a food processor and pulse until fine crumbs form.
- Tip: Don’t over-process! A mix of fine and slightly chunky pieces is best.
2. Mixing & Rolling the Dough
Now, it’s time to create the Butterfinger dough.
– In a large mixing bowl, combine crushed Butterfingers, peanut butter, powdered sugar, and vanilla extract.
– Stir until the mixture forms a thick, slightly sticky dough.
– Scoop out about 1 tablespoon of dough per ball and roll between your palms into smooth spheres.
– Place them on a parchment-lined baking sheet and chill in the fridge for 15 minutes.
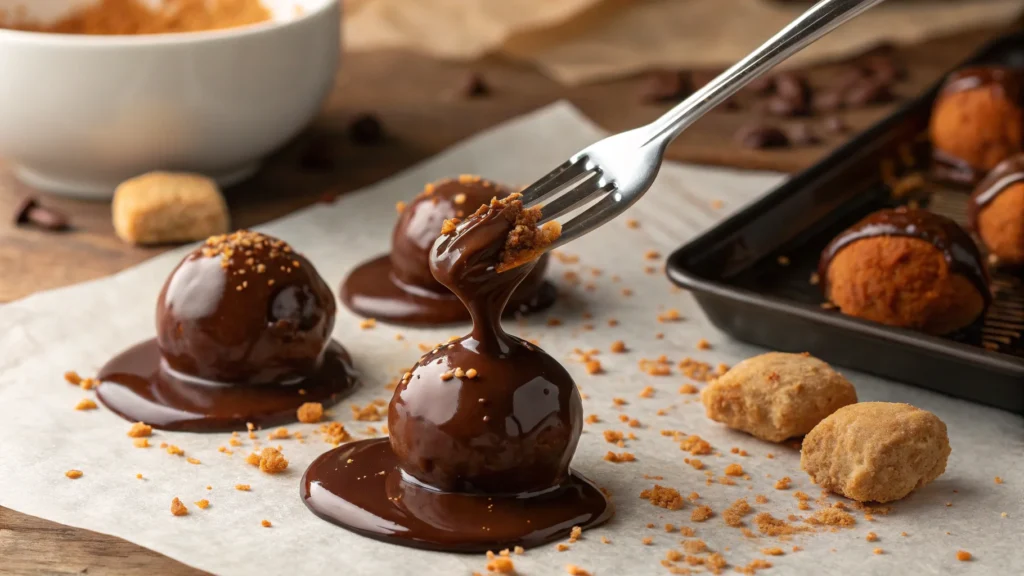
3. Dipping in Chocolate for the Ultimate Finish
To give Butterfinger Balls their delicious outer chocolate shell, follow these steps:
– In a microwave-safe bowl, melt chocolate chips and coconut oil in 30-second intervals, stirring in between.
– Using a fork or skewer, dip each Butterfinger Ball into the melted chocolate, ensuring it’s fully coated.
– Tap off any excess chocolate and return the balls to the parchment paper.
– If desired, drizzle with extra melted chocolate or sprinkle crushed Butterfingers on top.
– Chill in the fridge for at least 30 minutes until the chocolate hardens.
🎉 That’s it! You now have perfectly coated, crunchy homemade Butterfinger Balls.
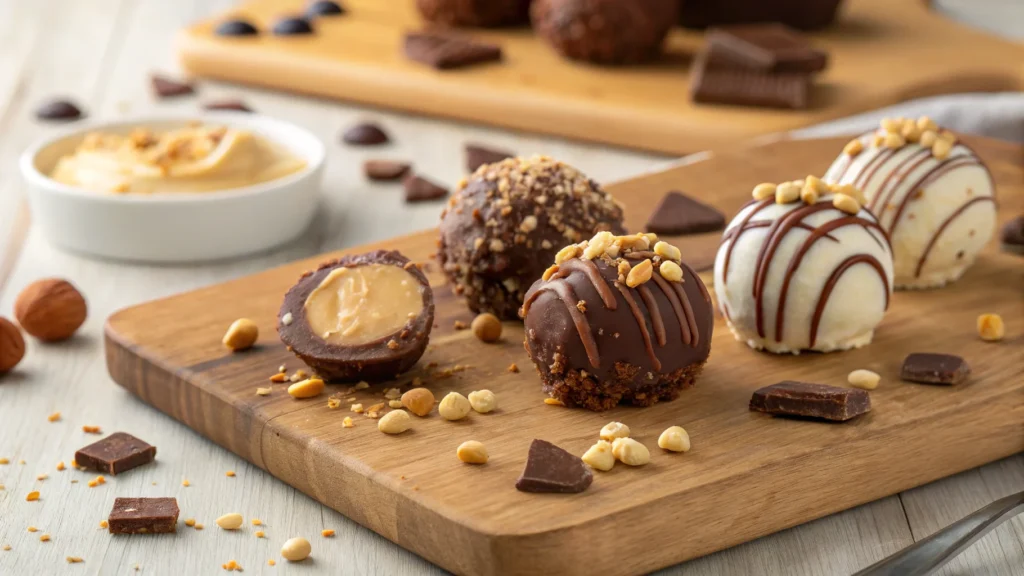
Butterfinger Balls Recipe Variations
One of the best things about Butterfinger Balls is how easy they are to customize! Whether you want a healthier version, or a new flavor combo, these variations will take your Butterfinger Balls to the next level.
1. Peanut Butter Lover’s Version
- Use extra peanut butter (1 ½ cups instead of 1 cup) for a creamier texture.
- Add ½ cup crushed peanuts for a crunchier bite.
- Drizzle with melted peanut butter before serving.
2. Keto & Low-Carb Adaptation
Want to make low-carb Butterfinger Balls? Try this version:
- Swap Butterfinger candy bars for sugar-free Butterfinger baking bits.
- Replace powdered sugar with monk fruit or erythritol sweetener.
- Use sugar-free chocolate chips for dipping.
3. White Chocolate Butterfinger Balls
For a sweeter, creamier version, use white chocolate instead of milk or dark chocolate.
4. Coconut Butterfinger Balls Recipe
Love coconut? Try this tropical twist!
- Add ½ cup shredded coconut to the dough.
- Coat in melted chocolate and roll in toasted coconut flakes.
With these variations, you can enjoy Butterfinger Balls in so many different ways!
Storage & Shelf Life
Since Butterfinger Balls are no-bake treats, proper storage is key to keeping them fresh and delicious. Here’s how to store them for maximum freshness.
How to Store Butterfinger Balls
| Storage Method | How to Store | Shelf Life |
|---|---|---|
| Room Temperature | Keep in an airtight container in a cool, dry place. | Up to 3 days |
| Refrigerator | Store in a sealed container to prevent drying out. | Up to 2 weeks |
| Freezer | Freeze in a single layer, then transfer to a freezer bag. | Up to 3 months |
Freezing Tips for Make-Ahead Desserts
– Place Butterfinger Balls on a baking sheet and freeze until firm.
– Once frozen, transfer to a ziplock bag or airtight container.
– Thaw in the fridge for a few hours before serving.
💡 Tip: If you want to enjoy them straight from the freezer, let them sit at room temperature for 5-10 minutes before eating.
Troubleshooting & Common Mistakes
Even though Butterfinger Balls are super easy to make, a few common issues can arise. Here’s how to fix them!
1. Why Are My Butterfinger Balls Recipes Too Soft?
If your Butterfinger Balls feel too mushy or won’t hold their shape, try these fixes:
– Add more crushed Butterfingers or powdered sugar to absorb moisture.
– Chill the mixture in the fridge for 15-20 minutes before rolling.
– Use less peanut butter next time if they are too wet.
2. How to Fix Chocolate That’s Too Thick?
If your melted chocolate is too thick to dip the balls smoothly:
– Add 1 teaspoon of coconut oil or butter to thin it out.
– Stir frequently while melting to avoid overheating.
– Use high-quality chocolate chips (cheaper ones tend to clump).
3. Preventing Butterfinger Filling from Crumbling
If your Butterfinger Balls are falling apart while rolling:
– Make sure the crushed Butterfingers are fine enough to mix well.
– Warm up the peanut butter slightly before mixing.
– Add a little extra peanut butter if the mixture feels too dry.
4. Why Won’t My Chocolate Harden?
If the chocolate stays soft or melts easily:
– Place the dipped balls in the fridge or freezer for 15-30 minutes.
– Use coconut oil in the melted chocolate to help it set properly.
– Avoid touching them too soon after dipping.
5. Chocolate Coating Cracking?
– Let the Butterfinger Balls warm slightly before dipping.
– Ensure the melted chocolate isn’t too hot—it should be warm, not scorching.
– Coat them twice for a smoother, even shell.
FAQs – Everything You Need to Know
Since Butterfinger Balls are inspired by the classic Butterfinger candy, here are answers to some of the most frequently asked questions about Butterfingers!
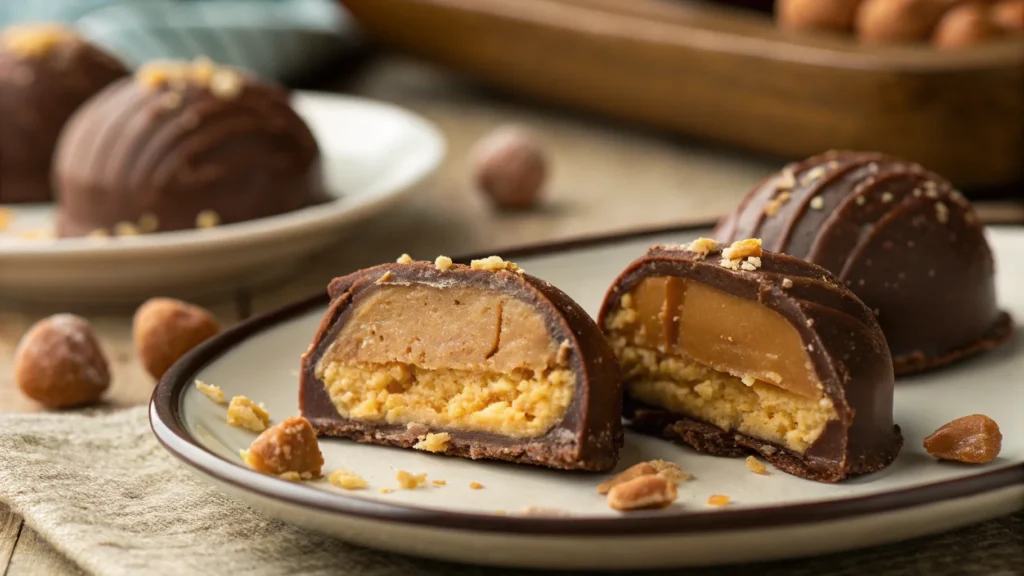
1. What is the orange stuff in Butterfinger Balls Recipe?
The signature orange filling inside Butterfingers comes from a mixture of molasses, cornflakes, and roasted peanuts. This combination gives it the crunchy, flaky texture we all love.
2. Why did the recipe for this candy change?
This popular peanut butter and chocolate candy underwent a slight recipe modification a few years ago. Some fans noticed differences in taste and texture, likely due to changes in ingredient sourcing or production methods. However, it remains a beloved treat with its signature crunchy, flaky filling and chocolate coating.
3. What is the flaky stuff in Butterfinger Balls Recipe?
The flaky, crispy layers inside a Butterfinger bar come from a special candy-making process called lamination, where peanut butter and sugar layers are folded together and cooked to create the unique crunch.
4. What is the stuff in the middle of a Butterfinger?
The center of a Butterfinger is made from a flaky peanut butter mixture, which is then coated in chocolate. The key ingredients include cornflakes, molasses, peanut butter, and sugar, which are cooked together and aerated to create the crispy texture.
Serving & Presentation Tips
Butterfinger Balls aren’t just delicious—they can also be beautifully presented! Whether you’re making them for a party, or just a sweet treat for yourself, here are some fun ways to serve and decorate them.
How to Plate for a Stunning Dessert Spread
– Use a White or Dark Plate – The contrast makes the chocolate coating pop.
– Drizzle with Extra Chocolate – Melt white, dark, or peanut butter chocolate and drizzle on top for a gourmet look.
– Stack Them in a Pyramid – Place them on a serving tray in layers for an elegant effect.
– Add Crushed Butterfinger Garnish – Sprinkle extra Butterfinger crumbs over the plate for decoration.
Best Drinks & Snacks to Pair with Butterfinger Balls
Butterfinger Balls go great with a variety of beverages and snacks:
- Hot Drinks: Serve with hot chocolate, coffee, or espresso.
- Cold Drinks: Pair with vanilla milkshakes or iced coffee.
- Other Desserts: Enjoy alongside brownies, cheesecake, or ice cream.
- Savory Pairings: Balance the sweetness with salty snacks like pretzels or salted nuts.
💡 Tip: Serve Butterfinger Balls on a dessert charcuterie board with cookies, chocolates, and fruit for an eye-catching presentation!
Conclusion & Final Thoughts
Butterfinger Balls are the perfect no-bake dessert—they’re easy to make, full of crunchy peanut butter goodness, and can be customized in so many ways! Whether you stick to the classic recipe or try a fun variation, these chocolate-covered treats are guaranteed to be a hit.
– Quick & Simple – No baking required, just mix, roll, and dip!
– Perfect for Any Occasion – Great for holidays, parties, or gifting.
– Endlessly Customizable – Try different flavors, coatings, or mix-ins.
If you love no-bake desserts, you might also enjoy this delicious and easy-to-make snack:
👉 Ground Chicken Mexican Corn Recipe – A Flavorful & Easy Meal – A savory dish to balance out your sweet treats!
Looking for more dessert inspiration? Don’t miss this ultimate guide:
👉 What is the Hardest Buttercream to Make? – Learn about the different types of buttercream and which one is the trickiest to master!
Try this Butterfinger Balls Recipe today and let us know how they turn out! Share your creations on social media using #ButterfingerBalls and tag us!